


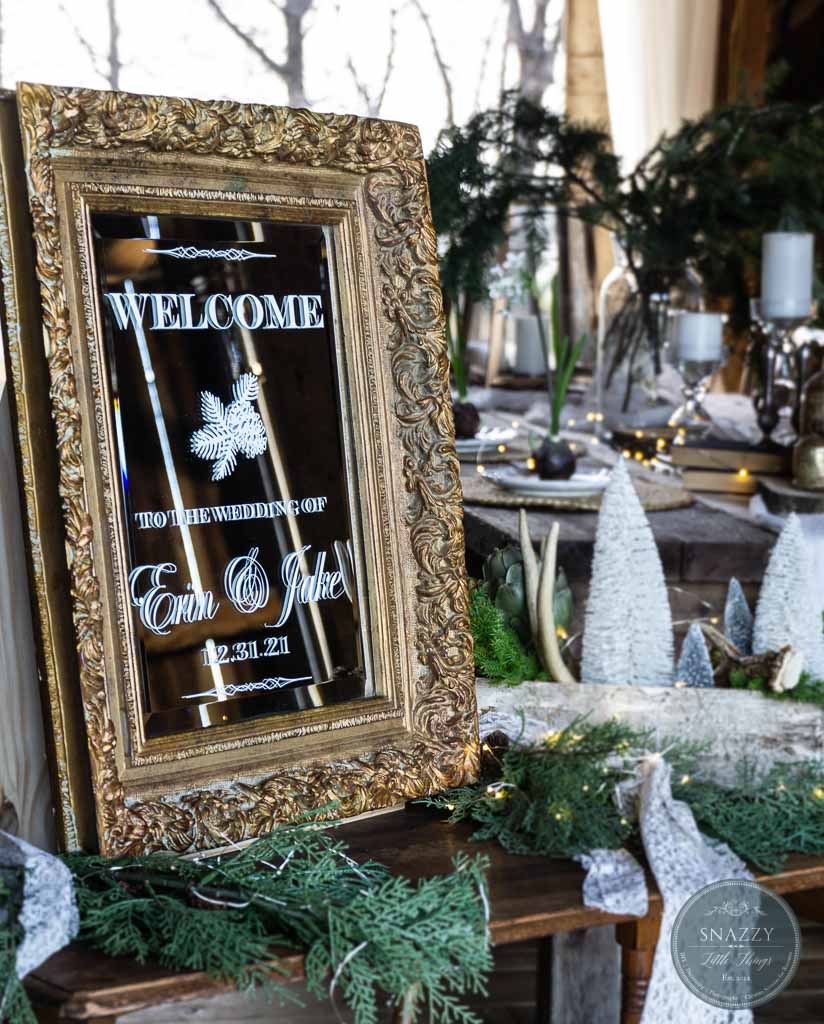
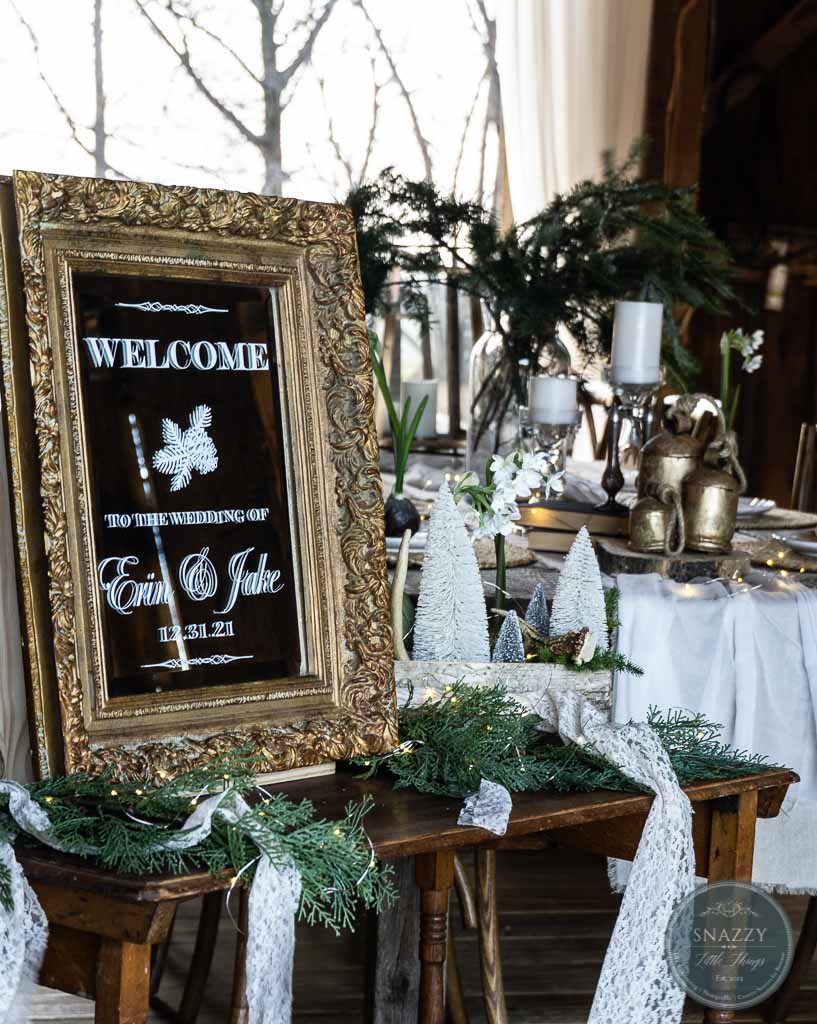
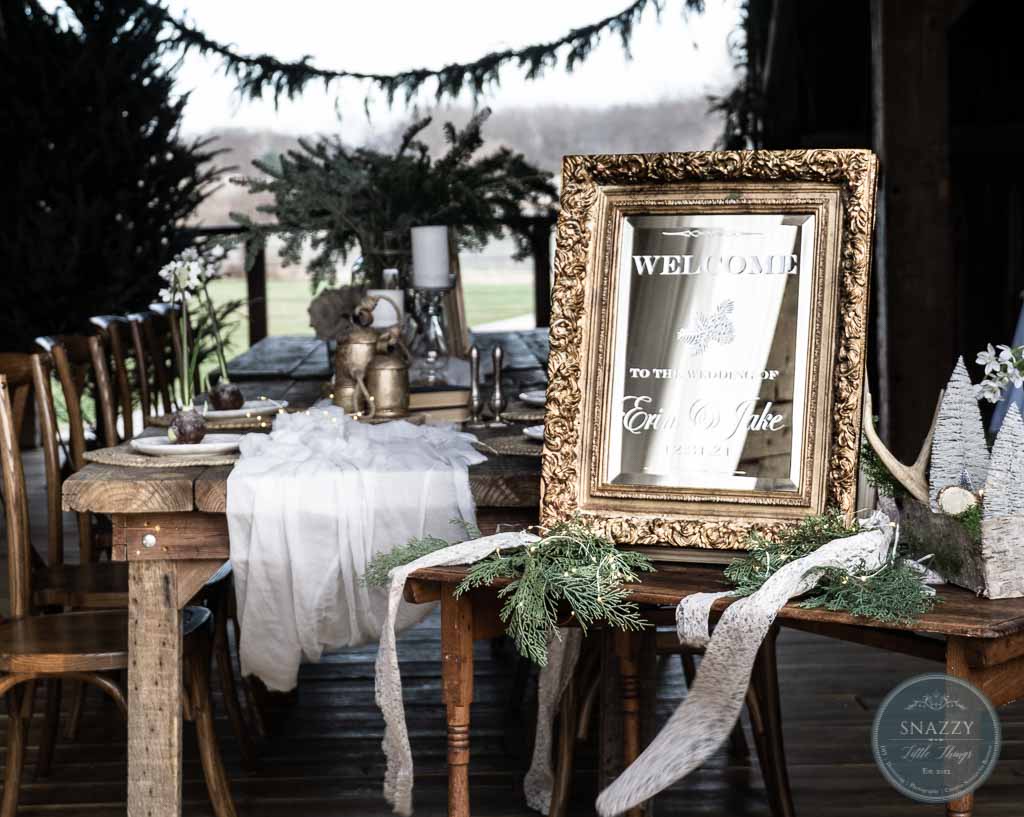
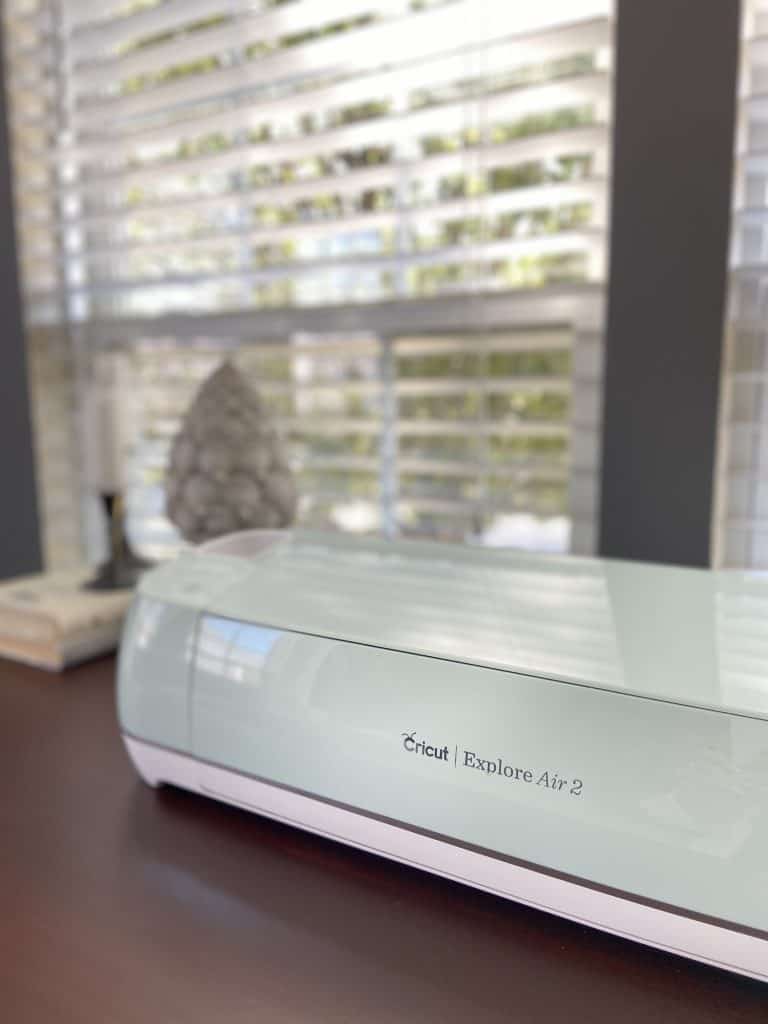
Winter marriage ceremony decor is simple to make while you use a Cricut Discover Air 2. Make this elegant welcome signal to set the tone on your occasion utilizing white detachable vinyl + a thrifted, gilded gold mirror from Fb Market.
I’ve been running a blog about house decor since 2012. I left my company day job and formally grew to become a Cincinnati based mostly portrait and marriage ceremony photographer in June 2021. This, after a pal of mine (additionally the proprietor of a 100+ 12 months of a fantastic barn marriage ceremony venue) satisfied me that pictures could be my true calling. Typically it takes one other individual to see your abilities extra clearly than we will see them ourselves. Kelly has grow to be such an incredible pal. She and I are kindred spirits and LOVE crafting, adorning, staging…and social gathering planning! Images has been an incredible approach for me to marry all of my passions together with adorning, pictures and staging lovely areas. (And I get to hang around together with her on this attractive house!)
DIY Mirrored Signal to Greet Your Marriage ceremony Company
Staging occasions is a giant a part of my job. Every time I host a photoshoot or occasion, Cricut has been a vital participant in creating easy, but attractive social gathering accents. Seasonal initiatives, weddings, and vacation occasions are straightforward when you might have the proper software for the job.
Mirrored “Welcome” Signal with Cricut Discover Air 2
Utilizing a thrifted mirror I had at house, I created this straightforward winter marriage ceremony “welcome” signal which might be good for many any winter occasion!
Supplies To Make a Mirrored Signal
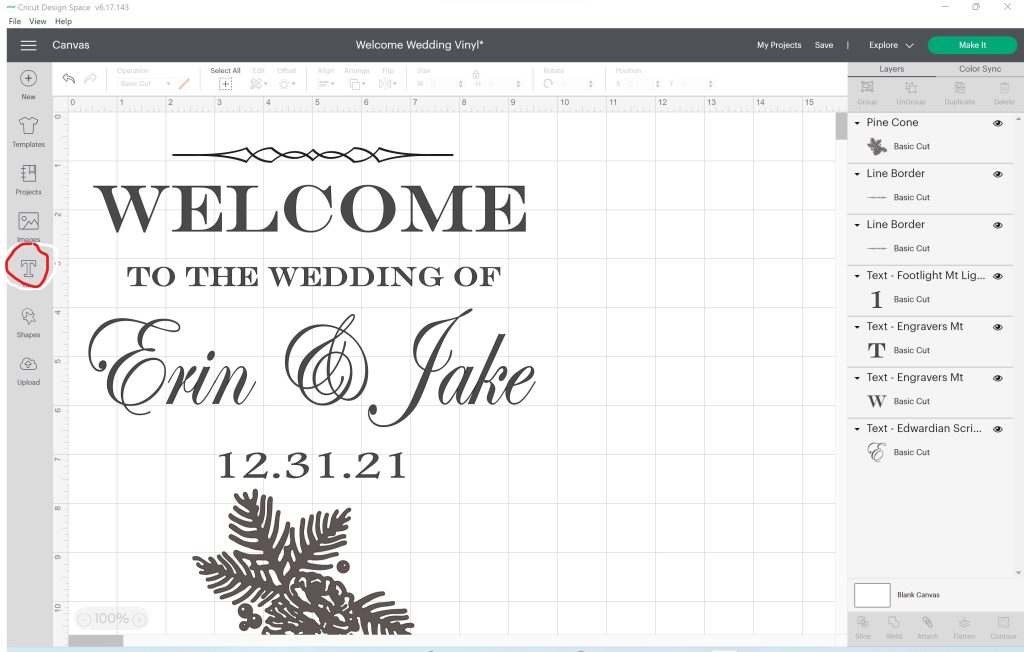
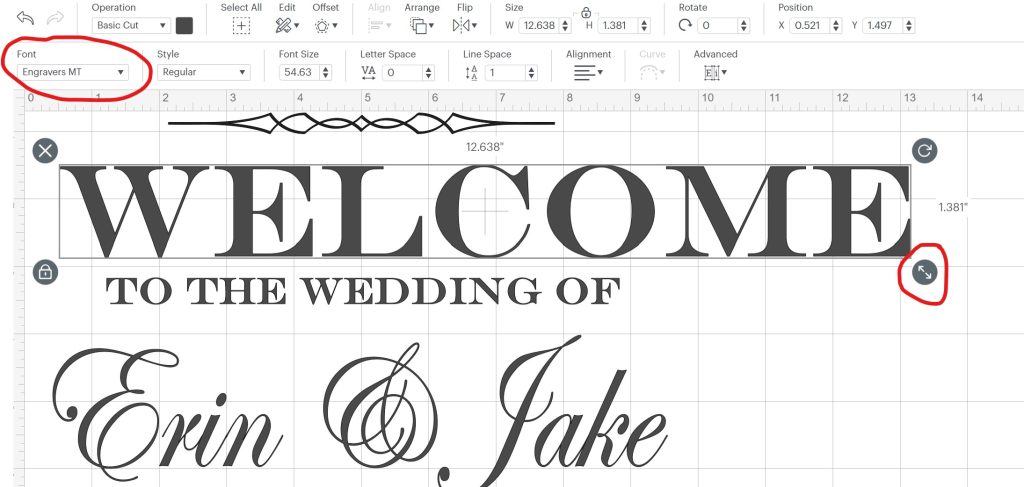
Learn how to Design: You have to entry to Cricut Design Area. The fonts I used (script) Edwardian Script. Engravers MT (serif font).
How-To Design in Cricut Design Area:
- Gather some attractive, classic mirrors. This mirror is a former member of my kitchen gallery mirror assortment.
- Open Cricut Deisgn Area. Click on “New Venture” within the higher proper nook.
- Add your lettering. Begin Designing by Clicking the Textual content icon on the proper. Begin laying in your textual content. I selected Engravers MT for all the serif fonts. And Edwardian Script for the names. Add an ornamental accent such because the pine cone that I used for my design (there are 1000’s ofS choices to select from!)
- As soon as every little thing is palced, click on “Make It”
- Set dial to “Vinyl” on the Cricut. Place a the vinyl face up on the minimize mat
- YOU WANT the sticky facet of the letters to stay to the mirror. So apply switch tape on TOP of the vinyl letters, on the non-sticky facet.
Try my TikTok video to see the method:
Go to my new web page, Linen & Elm Images on Fb and Instagram. Since June I’ve styled 5 photoshoots internet hosting distributors, shot 5 weddings and over 40 households. I’d say the enterprise is doing effectively (for these of you questioning the place I’ve been!) I really like styling, photographing…all of it!

See all of my different Cricut initiatives (together with Discover Air 2, EasyPress and Cricut Pleasure)
An industrial stylish craft space and multipurpose household sport room situated within the nook of a basement. An ideal spot…

It is a sponsored dialog written by me on behalf of Cricut. The opinions and textual content are all mine. Have…
It is a sponsored dialog written by me on behalf of Cricut. The opinions and textual content are all mine. If…
It is a sponsored dialog written by me on behalf of Cricut. The opinions and textual content are all mine. This…
It is a sponsored dialog written by me on behalf of Cricut. The opinions and textual content are all mine. See…
Should you aren’t that into adorning your own home with pink hearts and pink this Valentine’s Day, I’m proper there with…